 (3 votes, average: 5.00 out of 5)
How to Draw a Turtle (Red-Eared Slider)
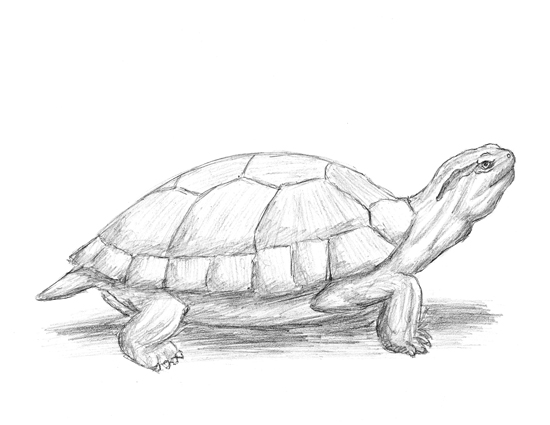
Please PAUSE the video after each step to draw at your own pace (scroll down to see the final red-eared slider turtle drawing).
For the first few steps, don’t press down too hard with your pencil. Use light, smooth strokes to begin.
Step 1: Draw an oval on its side as a guide for the red-eared slider turtle’s shell. It doesn’t have to be perfect. It’s just a guide.
Step 2: Draw a smaller oval on the top right side as a guide for the turtle’s head.
Step 3: Draw two lines that connect the two ovals and form the red-eared slider turtle’s neck.
Step 4: Under the big oval, draw two angled lines as guides for the turtle’s feet.
Step 5: Draw a small line on the right side of the big oval for the turtle’s tail.
That’s it for the initial sketch of a red-eared slider turtle! From this point on, press harder with your pencil to get a more defined sketch.
Step 6: Draw the turtle’s mouth at the end of the head. The mouth is a curved line on the edge of the oval with another line underneath as the chin. A small circle makes up the nose.
Step 7: Next to the mouth, draw the eye as a circle. Draw another circle inside as the pupil and shade it in.
Step 8: Draw a series of lines around the turtle’s eye for detail. The lines give the head a bumpier texture. Draw a bump on top of the turtle’s head to indicate the eye on the other side.
Step 9: Use the initial lines as guides to draw the rest of the turtle’s head and neck. Curve the lines to give the head and neck structure. Avoid using straight lines.
Step 10: Draw a curvy shape next to the turtle’s eye to represent the red portion of their head where the name red-eared slider comes from.
Step 11: Use the original oval as a guide to draw the top part of the red-eared slider turtle’s shell. Dip the back portion of the shell more toward the tail. Draw the bottom portion of the top shell using jagged lines to indicate the rough texture of the shell.
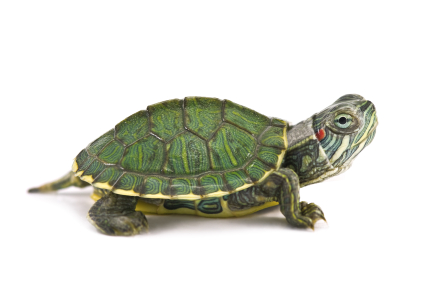
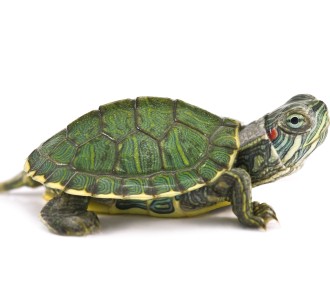
Step 12: Draw the shapes within the shell. Basically draw a row of square-like shapes at the bottom of the shell. Then draw more pentagon-like shapes above the row. It’s a good idea to use reference to be as accurate as possible. Otherwise, just have fun and design the turtle’s shell yourself.
Step 13: Draw the turtle’s feet using the initial lines as guides. Simply go around the guides, making the legs thicker and draw the toes at the end. At the end of each toe, draw a small triangle-like shape for the claws. Draw the front leg the same way. Go around the guide, then draw the turtle’s toes at the end. Don’t forget the claws!
Step 14: Use the original oval again to draw the bottom part of the shell. Darken the bottom part of the shell and dadd openings where the turtle’s legs go through.
Step 15: Use the small line on the left as a guide to draw the turtle’s tail.
Step 16 (optional): You can finish here for a sketchy look or erase as much as you can of the initial guide lines for a cleaner look. Don’t worry about erasing all the guides. It’s okay to leave some behind.
Step 17 (optional): Add some shading to give your red-eared slider turtle drawing more dimension and volume. Pick the direction of the light source when shading so that the shadows are consistent with it. Vary the pressure on your pencil to get different degrees of tonal value.
Step 18 (optional): Add a cast shadow underneath. This helps ground the turtle so it doesn’t appear to be floating.
Step 19 (optional): You can add more value throughout your turtle drawing for extra detail. Again, if you want accuracy, it’s a good idea to have reference as you draw.